يبلغ بعض مستخدمي NVIDIA عن مواجهة مشكلة عندما يحاولون ترقية برنامج تشغيل NVIDIA على أجهزة الكمبيوتر الخاصة بهم. لم تكتمل عملية الترقية ، مما يؤدي إلى ظهور رسالة خطأ تفيد - " فشل برنامج تثبيت NVIDIA ". يحدث هذا عادةً بسبب تثبيت برنامج تشغيل قديم / غير متوافق في كمبيوتر المستخدم. إذا كنت تواجه نفس المشكلة ، فلا داعي للقلق. ما عليك سوى تجربة هذه الإصلاحات على جهازك وسيتم حل المشكلة في أي وقت من الأوقات. ولكن قبل البحث عن الحلول ، جرب هذه الحلول الأولية وتحقق مما إذا كانت قد حلت مشكلتك-
الحلول الأولية -
1. إعادة تشغيل جهاز الكمبيوتر الخاص بك. الآن ، حاول تحديث برنامج تشغيل NVIDIA مرة أخرى وتحقق مما إذا كانت المشكلة لا تزال قائمة أم لا.
2. مؤقتًا ، قم بتعطيل برنامج مكافحة الفيروسات وجدار الحماية على نظامك. حاول الآن تحديث برنامج التشغيل مرة أخرى.
إذا كنت لا تزال تواجه رسالة الخطأ ، فانتقل إلى هذه الإصلاحات-
الإصلاح -1 إنهاء عمليات NVIDIA وحذف مجلد NVIDIA-
1. اضغط على Ctrl + Shift + Enter لفتح إدارة المهام .
2. الآن ، في علامة التبويب " العمليات " وانتقل لأسفل وسترى عمليات NVIDIA (مثل - عملية "NVIDIA Container") قيد التشغيل على نظامك.
3. انقر بزر الماوس الأيمن على كل من العمليات وانقر على " إنهاء المهمة " لإنهاء كل هذه العمليات.
يجب أن تشاهد هذه العمليات تعمل في نظامك-
NVIDIA Backend (32 بت) NVIDIA Driver Helper Service خدمة شبكة NVIDIA (32 بت) NVIDIA Settings NVIDIA User Experience Driver Component

4. افتح نافذة File Explorer ، وانتقل إلى هذا الموقع على محرك الأقراص الثابتة-
C: \ Windows \ System32 \ DriverStore \ FileRepository \
انتقل لأسفل في المجلد والبحث عن المجلدات التي لها أدناه بنود معينة في الاسم و حذف them-
nvdsp.inf
nv_lh
nvoclock

4. بعد ذلك، في ملف اكسبلورر، انتقل إلى هذه المجلدات و تفريغ them-
ج: \ ملفات البرنامج \ شركة NVIDIA \
C: \ Program Files (x86) \ NVIDIA Corporation \

5. أعد تشغيل جهاز الكمبيوتر الخاص بك وبعد إعادة التشغيل ، اتبع Fix-6 لتثبيت برنامج تشغيل NVIDIA يدويًا على جهاز الكمبيوتر الخاص بك.
الإصلاح 2 - استخدام موجه الأوامر
1. افتح موجه الأوامر كمسؤول.
2. قم بتشغيل الأمر الوارد أدناه واحدًا تلو الآخر في نافذة cmd.
bcdedit- مجموعة خيارات التحميل DISABLE_INTEGRITY_CHECKS bcdedit - مجموعة TESTSIGNING ON
3. الآن ، أعد تشغيل الكمبيوتر وحاول مرة أخرى. سوف تحل مشكلتك.
4. بعد ذلك ، افتح موجه الأوامر كمسؤول مرة أخرى وقم بتشغيل الأوامر الواردة أدناه لجعل الأشياء كما كانت من قبل.
bcdedit- مجموعة خيارات التحميل ENABLE_INTEGRITY_CHECKS bcdedit - ضبط TESTSIGNING OFF
الإصلاح -4 تحديث برنامج تشغيل NVIDIA من إدارة الأجهزة-
1. بعد الضغط على " مفتاح Windows + X " من لوحة المفاتيح ، انقر فوق " إدارة الأجهزة ".
سيتم فتح أداة إدارة الأجهزة .

2. بمجرد ظهور نافذة إدارة الأجهزة ، ابحث عن قسم " محولات العرض ".
3. الآن، من المنسدلة النقر بزر الماوس الأيمن على برنامج تشغيل الرسومات الذي تستخدمه. ثم ، انقر فوق " تحديث برنامج التشغيل ".

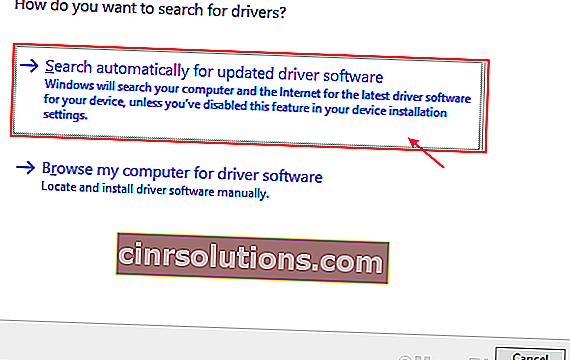
3. في النافذة التالية ، حدد الخيار الذي ينص على " البحث تلقائيًا عن برنامج التشغيل المحدث ".
بمجرد انتهاء عملية التحديث ، أغلق نافذة إدارة الأجهزة .
أعد تشغيل جهاز الكمبيوتر الخاص بك.
الإصلاح -3 قم بتثبيت برنامج تشغيل NVIDIA يدويًا-
1. في البداية ، قم بتشغيل Google Chrome.
2. بعد ذلك ، ابحث عن " برامج تشغيل Nvidia "
3. بعد ذلك ، يجب النقر فوق " تنزيل برامج التشغيل | NVIDIA ".

4.. الآن ، في هذه النافذة ، ضمن قسم "تنزيلات برنامج تشغيل NVIDIA" ، اختر " نوع المنتج " ، " سلسلة المنتجات " ، " المنتج " ، " نظام التشغيل " ، " نوع برنامج تشغيل Windows " ، " نوع التنزيل " وفقًا لمواصفات برنامج التشغيل الخاص بك.
5. بمجرد اختيار منتجك ، انقر فوق " بحث ".

6. ثم انقر فوق " تنزيل " لتنزيل برنامج التشغيل.

أغلق المتصفح.
7. حدد موقع التطبيق الذي تم تنزيله على القرص الخاص بك.
8. ثم انقر نقرًا مزدوجًا فوقه لبدء عملية تثبيت برنامج التشغيل.

9. Now, in the NVIDIA Graphics Driver window, click on “NVIDIA Graphics Driver and GeForce Experience” and click on “Agree and continue“.

10. Under Installation Options, choose “Express (Recommended)” and click on “Next” to start the installation process.

11. After installation is done, click on “Close” to close the NVIDIA Graphics Driver Installer window.

Restart your computer to finish the installation process.
If you are still facing the problem during the installation, perhaps performing a clean installation of the NVIDIA driver can help you out.
Fix-4 Perform a Clean install
[NOTE– Performing a clean installation will clear any kind of custom settings of the driver on your device. But it will remove any further errors in the NVIDIA installer from your device.]
The NVDIA installer you downloaded during the manual installation (i.e. the Fix-6)will be used in this fix.
1. Go to the location where the installer is located on your computer.
2. When you are in that location, double click on the installer to start the installation.
3. In the NVIDIA Installer window, choose the option “NVIDIA Graphics Driver and GeForce Experience“.
4. Then, click on “Agree and continue“.
5. Now, choose “Custom installation“.
6. Click on “Next” to start the installation process.

7. Now, checkthe “Perform a clean installation” option.
8. Finally, click lick on “Next“.

After installation is done, click on “Close” to close the NVIDIA Graphics Driver Installer window.
Restart your computer to finish the installation process.
You should not face any further issues with the installation of the NVIDIA driver.
Fix-5 Use Display Driver Uninstaller-
1. Download the DDU.zip on your device and after downloading it, unzip the folder in a favorable location of your choice.

2. Now, press Windows Key+R to launch Run, and “control printers” and hit Enter to open Device and Printers window in Control Panel.

3. Now, right-click on your computer name and then click on “Device installation settings“.

4. Now, choose “No (your device might not work as“ expected) and click on “Save Changes“.

Close the Devices and Printers window.
5. Then, google “Nvidia drivers” from your browser and click on “Download Drivers|NVIDIA“.
6. Now, in this window, under ‘NVIDIA Driver downloads’ section choose “Product type“, “Product series“, “Product“, “Operating System“, “Windows Driver Type“, “Download Type” according to your driver specifications.
Once you have chosen the right driver for you computer, click on the “Search“.
7. Click on “Download” to start the downloading process.
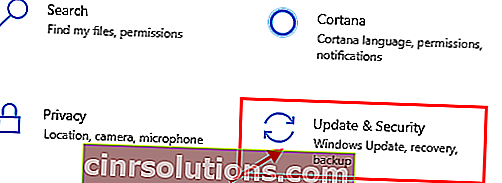
8. Press Windows Icon+I to open Settings application, now click on “Update and Security“.
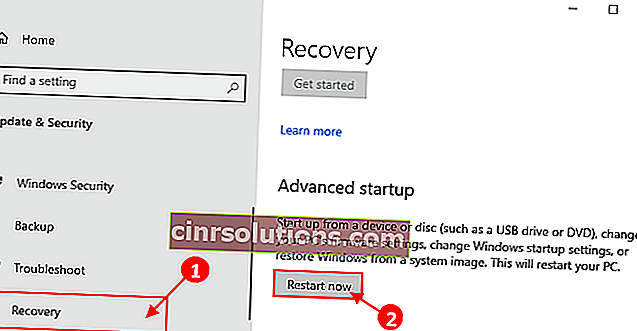
9. Now, on the left pane, click on “Recovery“,
Then, on the right-hand side of the screen, click on “Restart Now” under Advanced Startup.
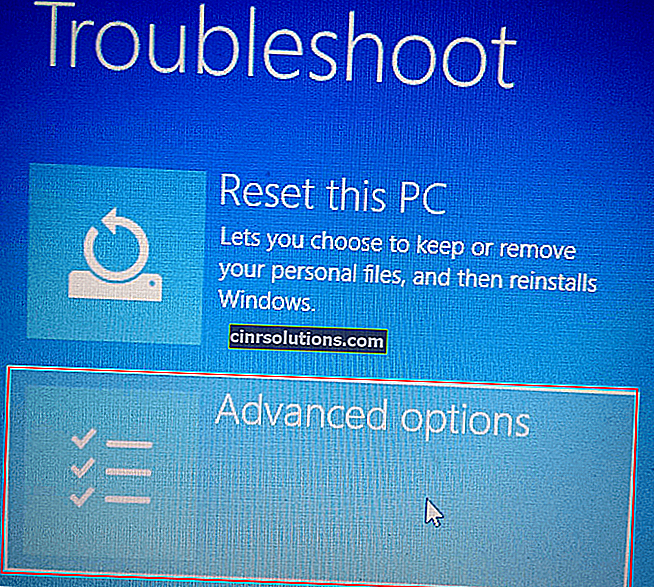
10. Then click on “Advanced options“.
11. Now, within the Advanced options window, click on the “Startup Settings“.

12. Then, click on “Restart”.

13. Now, just press 4 from your keyborad to “Enable Safe Mode“.

In Safe mode, the background of your desktop will be black.
14. Now, navigate to the file location where you have extracted DDU.zip. Double click on “DDU v18.1.0.9” to extract the main files.
Go to the extracted folder, and double click on the “Display Driver Installer” to run it on your device.

15. Now, in the Display Driver Uninstaller window, on the left-hand side, click on the drop-down beside “Select device type” and click “GPU” and finally click on “Clean and Restart“.

16. This will uninstall the NVIDIA driver from your system and you will be booted to normal mode again.
17. Now, you have to boot into safe mode again ( follow the instructions in Step-8 to Step-13 of this fix).
18. After booting into safe mode, locate the downloaded application on your disk.
19. Now, double click on it to start the installation process of the driver.
20. Once the installation process has finished, click on “Close” to close the NVIDIA Graphics Driver Installer window.
Restart your computer to finish the installation process.
21. After rebooting, press Windows Key+R and write “control printers“.
22. Click on “OK“.
24. Now, right-click on your computer name and then click on “Device installation settings“.
25. Now, choose “Yes (recommended)” and click on “Save Changes“.

You should not face any further issues with the installation of the NVIDIA driver.
Fix-6 Perform Clean Boot-
1. To open the Run terminal on your desktop, press Windows key+R.
2. Then, type “msconfig” and after that, click on “OK“.

3. After that go to the “General” tab
4. In the General tab, uncheck the box beside the “Load startup items“.
5. Finally, you have to make sure the “Load system services” is checked.

6. Now, click on the “Services” tab.
7. Click once beside the option “Hide all Microsoft services” to check it.
8. To disable all these services, click on the “Disable all“.
9. Now, click on “Apply” and “OK“.

Reboot your computer, it will be booted in clean mode.
Fix-7 Rollback the existing display adapter-
1. At first, right-click on the Windows icon and then click on the “Device Manager“.
Device Manager utility will open.
2. In the Device Manager window, find “Display adapters” from the list, click on it to expand it.
3. Now, from the drop-down double click on the NVIDIA graphics driver, you are using. The properties window will open.

3. في نافذة الخصائص ، انتقل إلى علامة التبويب " برنامج التشغيل ". انقر فوق " استرجاع برنامج التشغيل ". انقر فوق " موافق". سيؤدي هذا إلى استعادة التحديثات القديمة لبرنامج تشغيل الرسومات NVIDIA الخاص بك وسيتم استبداله بالإصدار الأقدم من برنامج التشغيل الخاص بك.

4. الآن ، عند السؤال " لماذا التراجع؟ "، اختر" لا تعمل تطبيقاتي مع برنامج التشغيل هذا ".
5. الآن ، انقر فوق " نعم " لبدء عملية التراجع.

أغلق نافذة إدارة الأجهزة .
أعد تشغيل جهاز الكمبيوتر الخاص بك. بعد إعادة التشغيل ، يجب أن تكون قادرًا على تحديث برنامج التشغيل دون أي خطأ.